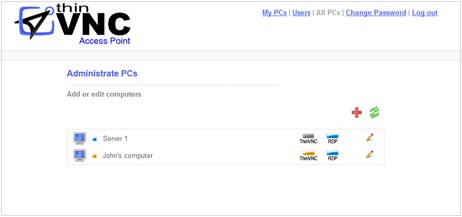
1. Click on the "All PCs" option in the top-right corner menu.
** If you don't see the "All PCs" options in the menu, it is probably because you have logged in with a non "Admin" user account.
2. You will see here a list of all PC's you have defined. To add a new PC, click on the red plus symbol (add button):

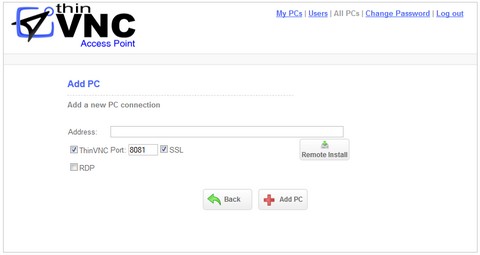
3. Enter the PC Address and configure the other connection settings:

Address |
Enter the address of the PC you want to add to ThinVNC Access Point. |
ThinVNC |
Check this option if the computer has a ThinVNC server. Complete the port number and check the SSL option if it's an https connection. |
RDP |
Check this option if the computer has RDP accessibility. Complete the port number. |
Advanced Options |
Click to expand and see more options. You can also edit them later. |
Keyboard |
Disable Unicode Keyboard for XRDP connections. |
Start Program |
Choose this option to have a program start when you connect through RDP to the remote desktop. Only available to connect to Windows server versions. |
File Name |
Complete the name of the executable file that launchs the program. |
Working Directory |
Specify the directory where the executable file is placed. |
Remote Install |
Use this option to install ThinVNC in a LAN computer. |
3. Press "Add PC".
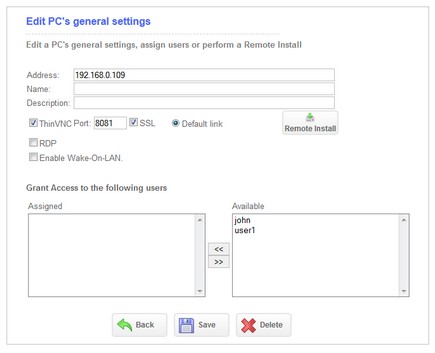
4. The complete settings form will be presented to you. Configure the other PC settings:

Name |
Choose a name for the computer. By default it will be auto completed with the address. |
Description |
Enter a description for the computer. |
Default Link |
Choose whether the default link for this PC will be ThinVNC or RDP. The user can still access both ways when its account has the "Show protocol links" checked. If this option is unchecked, the user will only be able to connect using the PC selected "Default link". |
Enable Wake-on-LAN |
Enable Wake-On-LAN if you want to turn on this remote PC from ThinVNC Access Point. You need to complete the MAC Address information. |
Mac Address |
Inform the Mac Address to enable the "Wake-on-LAN" feature. The button by the side the Mac Address field ("Refresh" button) will retrieve the MAC Address from the PC automatically. |
4. You can grant the users access to this PC:
a. Select the user from the "Available" list
b. Move the user to the "Assigned" list to grant him/her permission to access this computer. Use the arrows to move it from one list to another.
5. When you are done, press "Save".