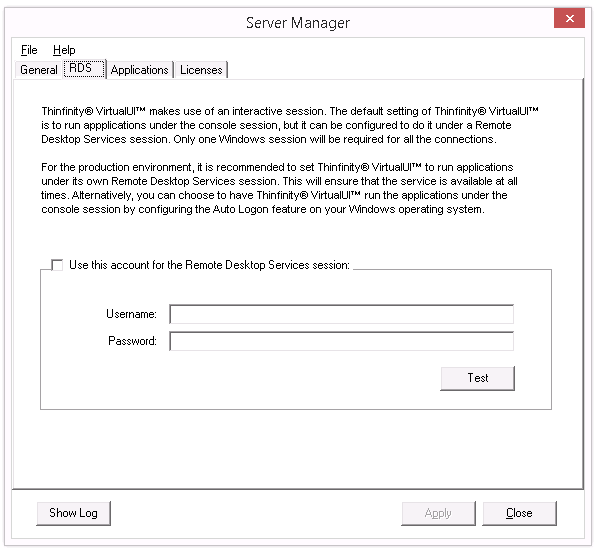
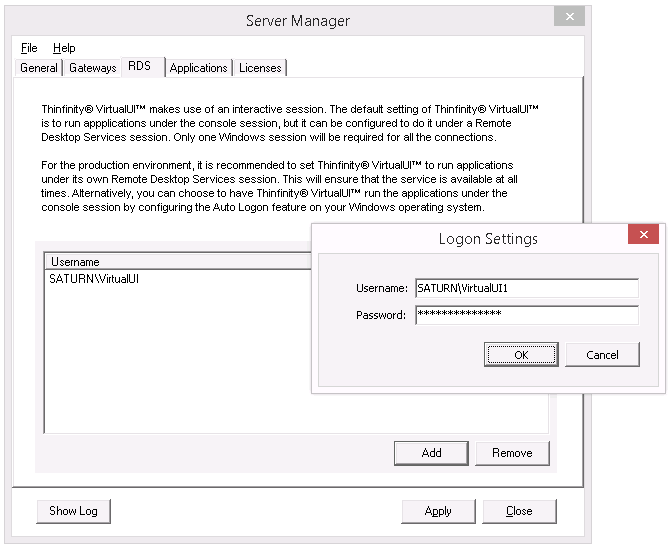
In the Thinfinity® VirtualUI™ manager 'RDS' tab you will find the following options:
Standard Mode installation:

Use this account for the Remote Desktop Services session: |
Check this option to enable Thinfinity VirtualUI to run applications under a separate Remote Desktop Services session. |
User name |
Enter the username for the Remote Desktop Services session you want Thinfinity VirtualUI to run applications under. |
Password |
Enter the password for the Remote Desktop Services session you want Thinfinity VirtualUI to run applications under. |
Test |
Test the credentials entered to verify that the username and password are correct and can access RDS. |
Load Balancing Mode installation:

User name |
This table shows the RDS sessions that will handle Thinfinity VirtualUI connections. You can use more than one session when you have a lot of connections, so that it is distributed between different sessions in the same computer. You can combine this with a Scaling and Load Balancing. |
Add |
Press this button to add another RDS account. |
Remove |
Press this button to remove a selected RDS account. |
Always remember to press 'Apply' in order to save the changes.
Read More: