How to set up multifactor authentication to your environment or virtualized application.
In this quick tutorial, we will show how to properly configure Okta OAuth 2.0 for Thinfinity Remote Desktop Server and Thinfinity VirtualUI.
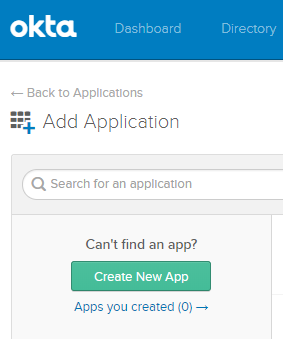
1) Navigate to your Okta space, go to the Applications tab, and create a new application using the “Create New App” button :
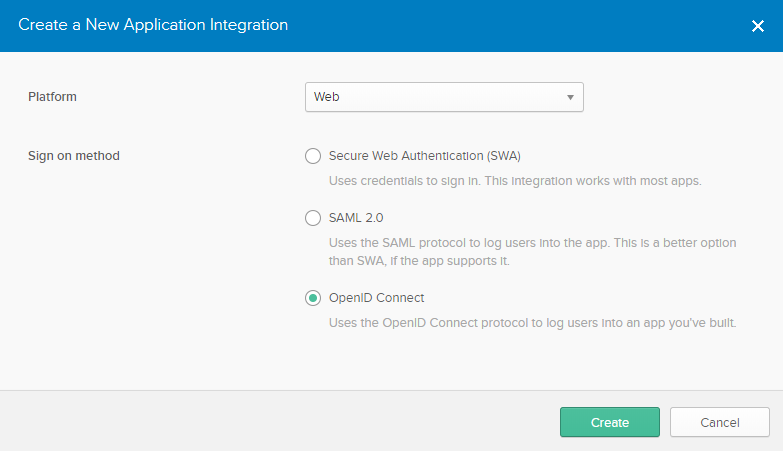
2) Select OpenID Connect as the Authentication Method :
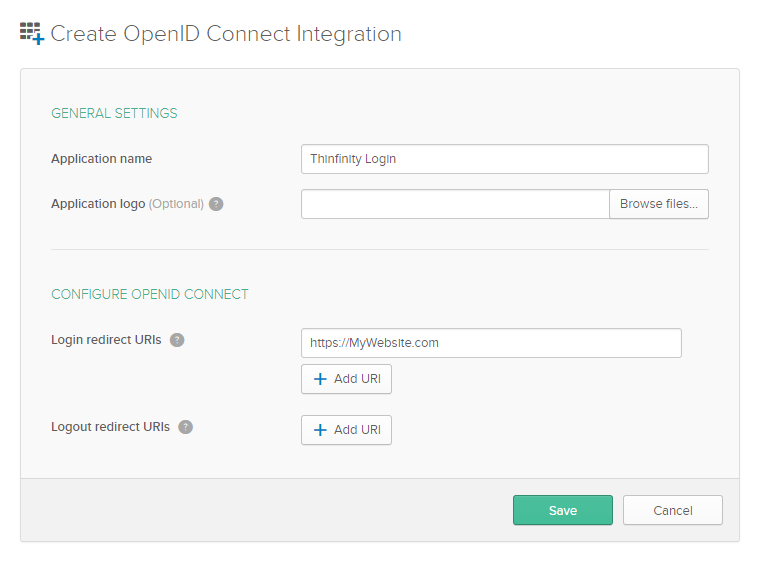
3) Give the application a name, and type in the URL you use to reach Thinfinity. Then press “Save”.
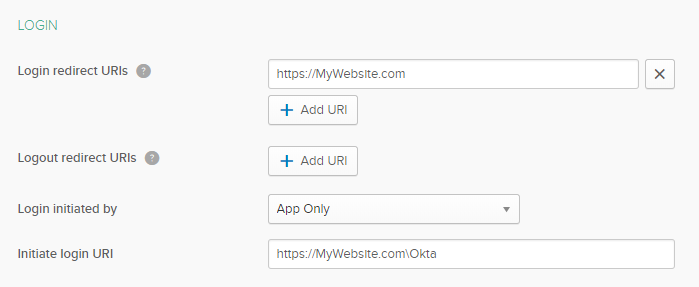
4) You should be redirected to the Application Settings. In here, press the “General” button, and edit the “Login information”.
Configure the “Initiate login URI” field, by adding the Thinfinity’s website address and “/Okta” at the end of the URL.
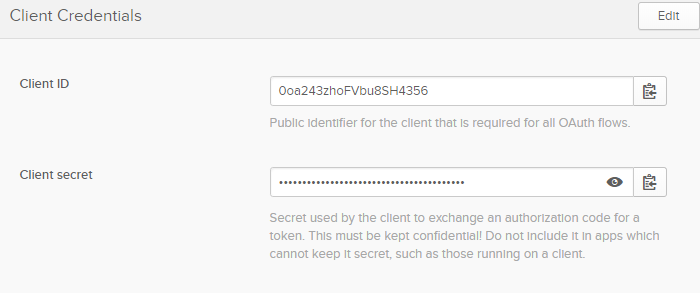
5) Copy and past both Client ID and Client Secret for future references :
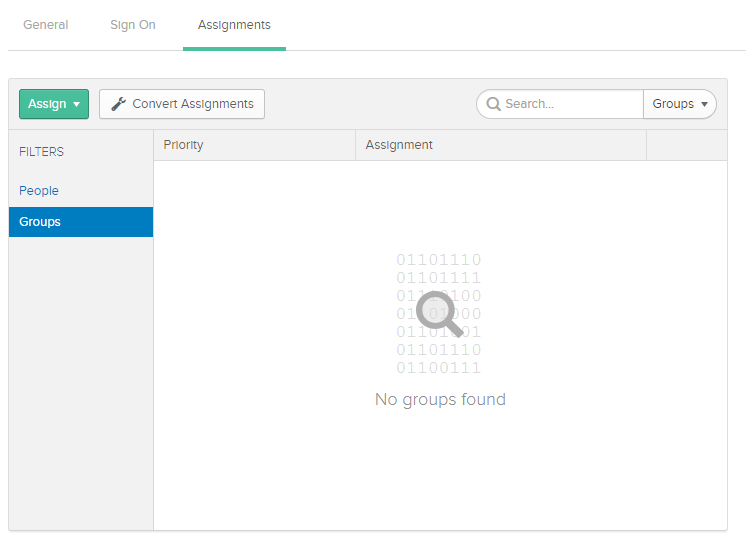
6) Click on the “Assignments” tab and add your users to the Application :
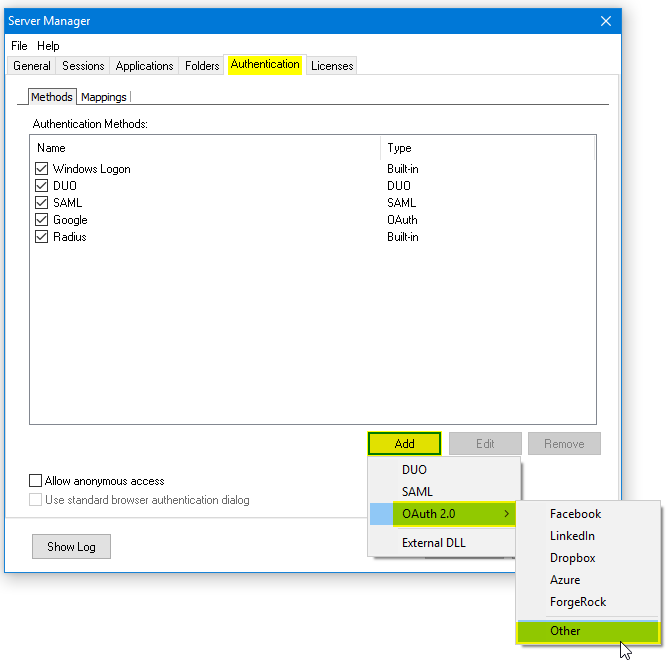
7) Now , open either the Thinfinity Remote Desktop Server Manager or the Thinfinity VirtualUI Manager and navigate to the “Authentication” tab. Click on OAuth 2.0 and choose “Other”.
8) Enter your Client ID and Client Secret :
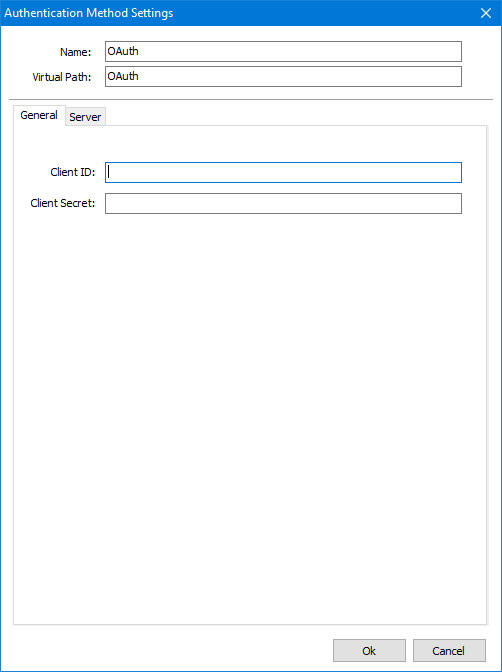
9) Click on the “Server” tab and add the following parameters :
Authorization URL: https://[MyOktaSpace].okta.com/oauth2/v1/authorize
Parameters: scope=openid+profile&state=okta
Token Validation Server URL: https://[MyOktaSpace].okta.com/oauth2/v1/token
Profile Information Server URL: https://[MyOktaSpace].okta.com/oauth2/v1/userinfo
Login username value in returned Json: preferred_username
You’ll also need to change the name of the Authentication Method to “Okta” ( Or to the URL you configure in the Initiate Login URI )
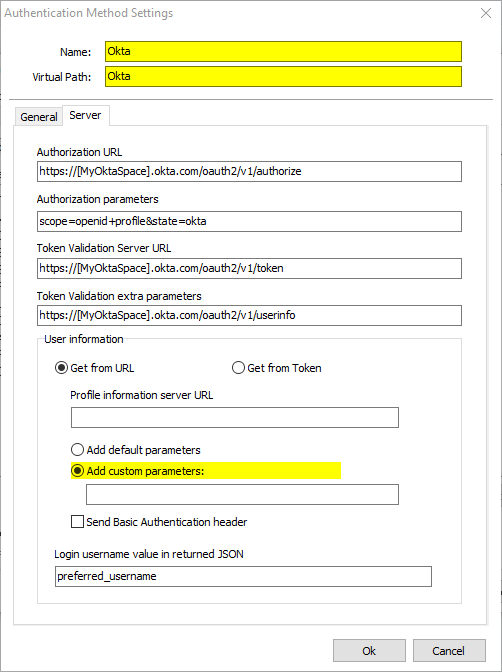
Press “OK” after you finish configuring the Authentication Method
10) Click on the “Mappings” tab and then press “Add” under the Authentication ID Mask.
Add the email address of the Okta user you want to validate and press “Ok”.
Then, under the “Associated Permissions” field, press on the “Add” button and search for the Active Directory User
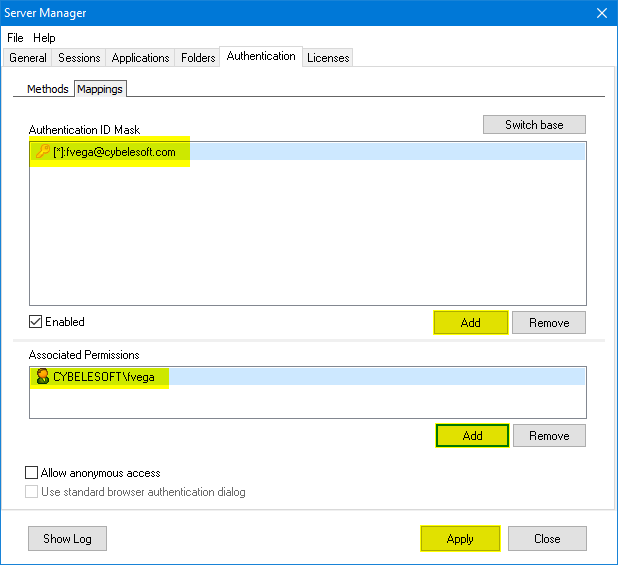
After you add the appropriate mappings, click on the “Apply” button.
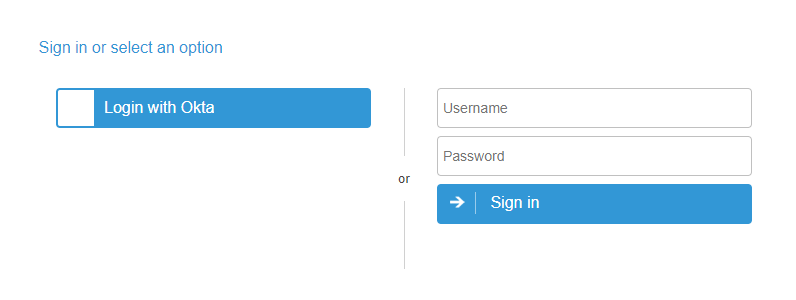
11) Navigate to the Thinfinity’s landing page, and you should see the “Login With Okta” option listed as an Authentication Method.
