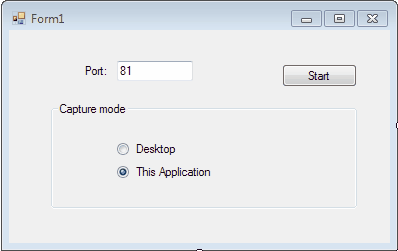
Let's create a simple ThinVNC server using Microsoft Visual Studio:
1. Create a new project: Open Microsoft Visual Studio and start a new Windows Form Application project. Let's name it "ThinVncServer".
2. Add a reference to "ThinVNC Server" ActiveX library: On the Solution Explorer pane right-click on the ThinVncServer project node and select "Add Reference".
3. Add a few controls to the form:

4. Add code:
An initialization code.
Public Class Form1
' Declares ThinVnc and ScreenScraper components Dim tvnc As New ThinVncX.ThinVnc Dim scraper As New ThinVncX.ThinScreenScraper
Public Sub New() ' This call is required by the Windows Form Designer. InitializeComponent()
' Instanciates a new ThinVnc and ScreenScraper component tvnc = New ThinVncX.ThinVnc() scraper = New ThinVncX.ThinScreenScraper()
' Tells ThinVnc to use ScreenScraper tvnc.Scraper = scraper End Sub |
The "Start" button code
Private Sub bStart_Click(ByVal sender As System.Object, ByVal e As System.EventArgs) Handles bStart.Click If Not tvnc.WebServer.HttpActive Then tvnc.WebServer.HttpPort = CInt(textPort.Text) End If tvnc.WebServer.HttpActive = Not tvnc.WebServer.HttpActive End Sub |
5. Compile and run the project.
6. Try it out by typing a port number into the textbox and press the "Start" button. Most likely, Windows Firewall will ask you to set up an exception. Add the exception and then open a Web Browser (preferably in another PC) and type http://yourpc:port.
You should be able to see and control the PC desktop.