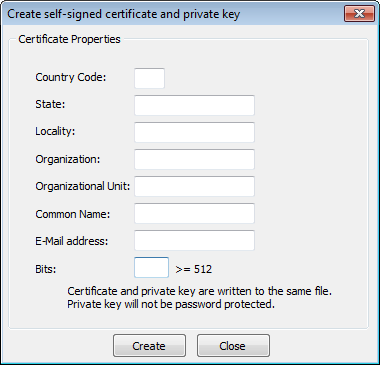
This option is used to create your own self-sign certificate.
1. Go to the z/Scope Anywhere Configuration Manager, click on the "Server Settings" box and then go to the "Communication" tab. Press the "Manage Certificate" button.
2. Press the "Create a self-signed certificate" button.
3. Fill in the form below with your organization data:

4. The "Common Name" field should be filled with the server+domain that will be used to access the z/Scope Anywhere server (zscopeanywhere.mycompany.com).
5. Press Create.
6. Select the location where you want the certificate to be stored.
7. The application will start using this self-signed certificate just created by you.
Note: Because this certificate is not issued by a known Certificate Authority (CA), the web browsers will warn you they can not verify its authority.
Read more: