Before configuring the Thinfinity® Remote Desktop Server integration with Google accounts (single-sign-on), you have to create a Google Client ID for web applications.
Remember that a Google Client ID has to be created under an existing Google account. We recommend that you use a Google account that identifies the system administration, because this account will be shown to users as the responsible for their account personal data that will be accessed from Google.
Follow the next steps to create your own "Google Client ID for web applications".
1. Log into Google with the admin account you will use for the integration configuration.
2. Open this URL: code.google.com/apis/console on the same browser instance.
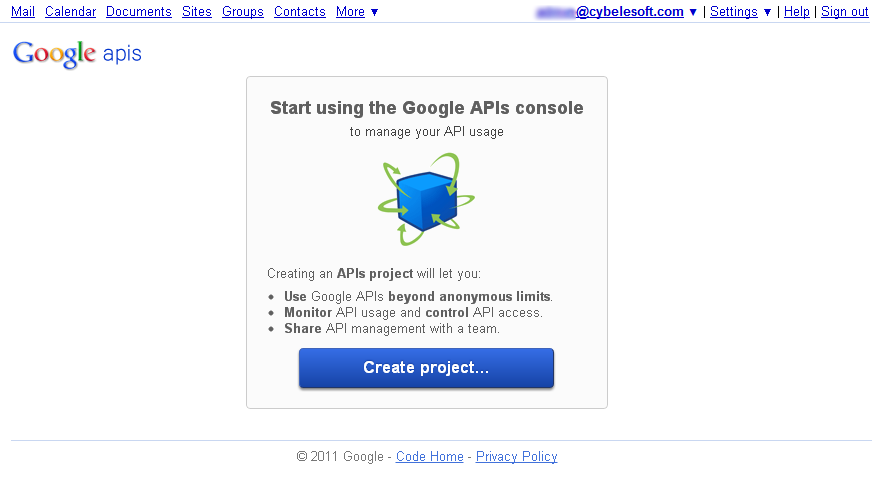
3. Click on the "Create Project button". This step will only be needed if your Google account has never configured a Google Client ID before. Otherwise it will jump into the next step.
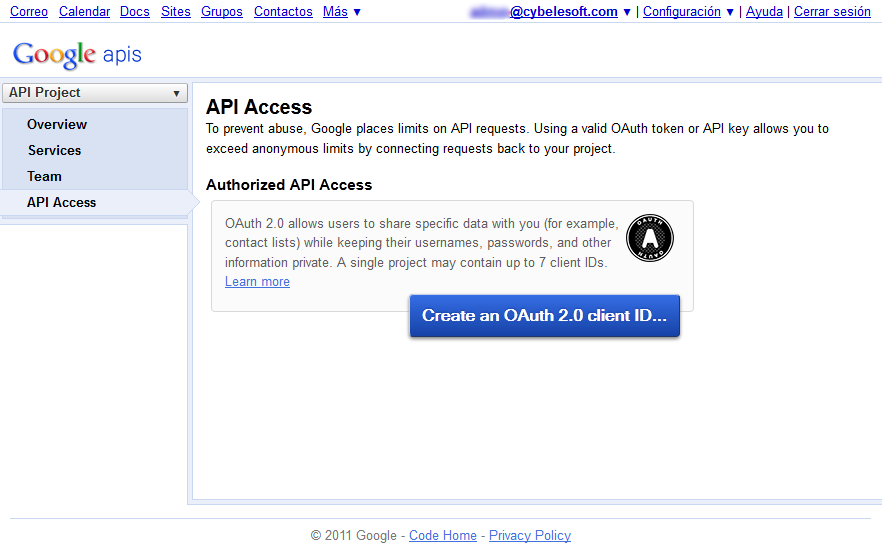
4. Click on the left menu option: "API Access".
5. Click on the "Create an OAuth 2.0 client ID..." middle button.
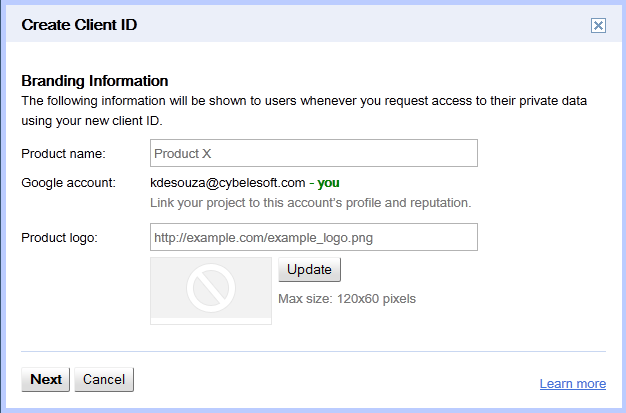
6. Fill in the Branding Information on the "Create Client ID" screen:
| a) On the "Product name" field enter a name that will identify the application and the company to the users. This information is shown when the users are asked to confirm their data sharing with this entity/product. |
| b) The Google account does not have to be changed. |
c) You can also enter a logo image to be shown to the users on the registration moment (it will be shown in the same step as the product name).
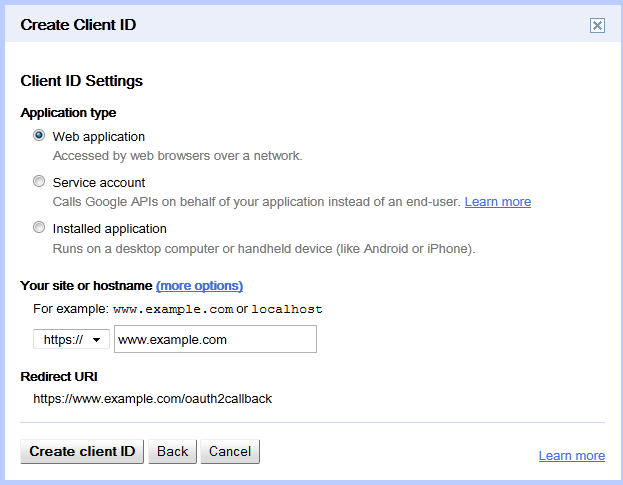
7. Set the Application Type option to "Web application" and enter the external server URL. This URL should be accessible in the location that users will connecting to the application from.
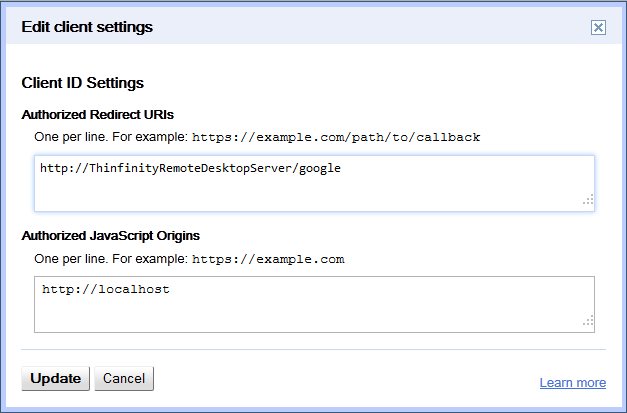
8. Once the account is created, click on the "Edit Settings" button and change the URI to http://ThinfinityRDPServer:port/google, like the example below, and click on "Update".
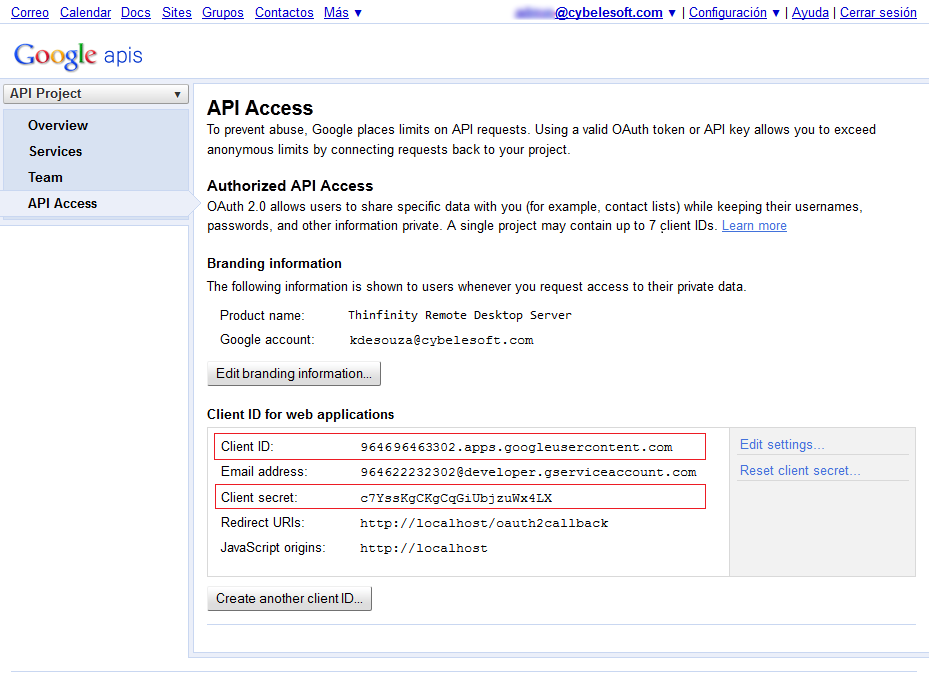
9. Copy the "Client ID" and "Client Secret" values to posterior use on Thinfinity® Remote Desktop Server. Find these fields surrounded by a red square, on the image below:
This help system was created with an evaluation copy of Help & Manual.