On the Centrify’s Admin Portal.
1) Click on “Apps” -> “Web Apps” :
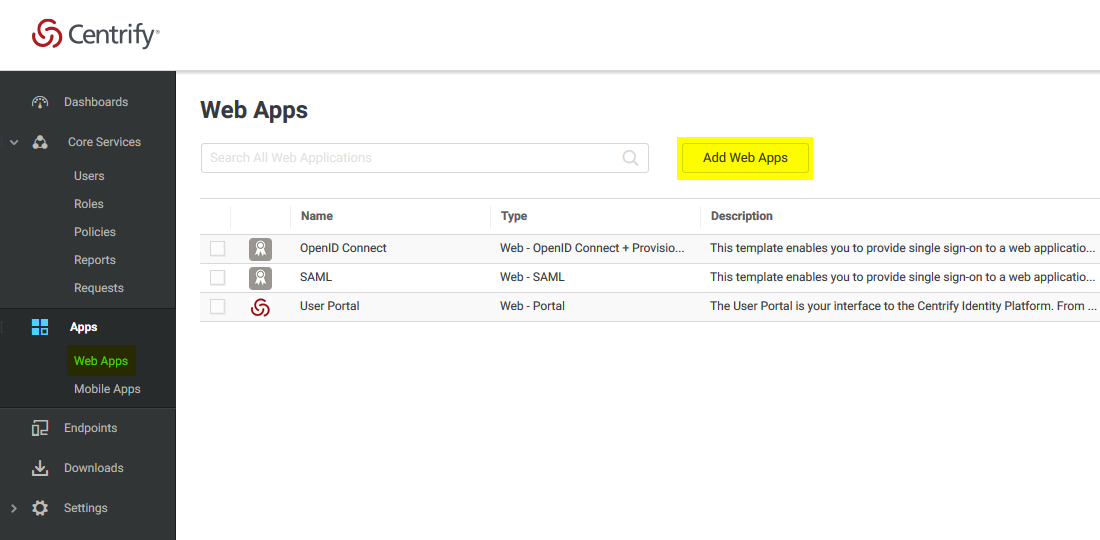
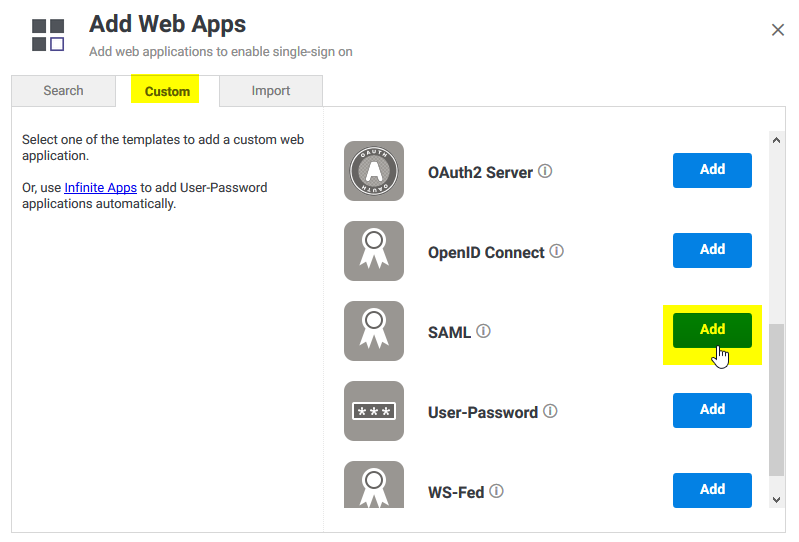
2) Click on “Custom” and next to SAML, press “Add”
3) Give your application a name , and click on the “Trust” tab .
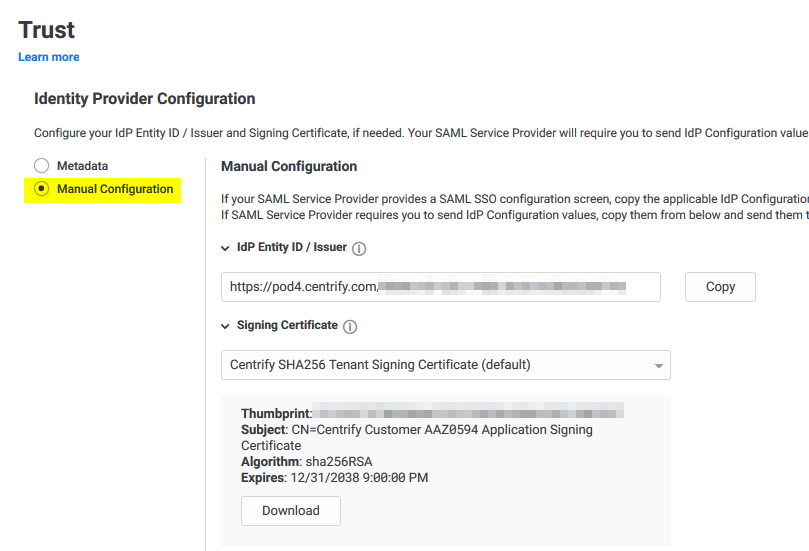
Click on “Manual Configuration” , and copy the IdP Entity ID , and download the certificate provided by Centrify.
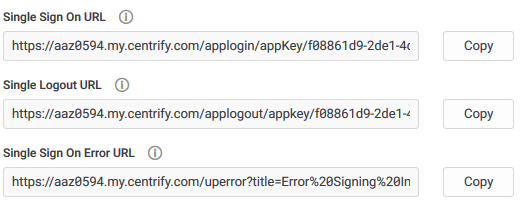
4) Then copy the “Single Sign on URL” , and the “Single Logout URL” :
5) Now , on the “Service Provide Configuration” , click on “Manual Configuration” and configure the following :
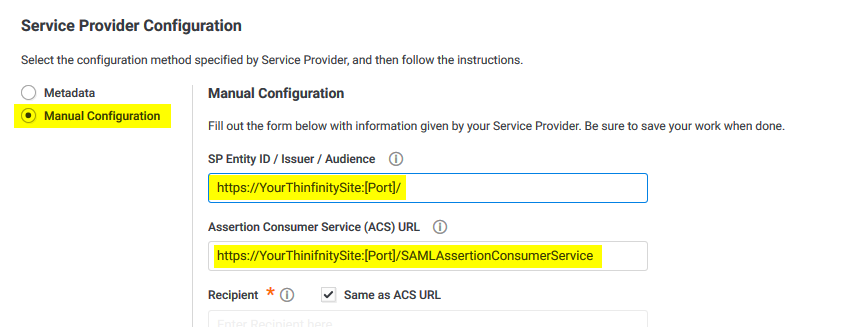
After doing these changes, click on the “Save” button.
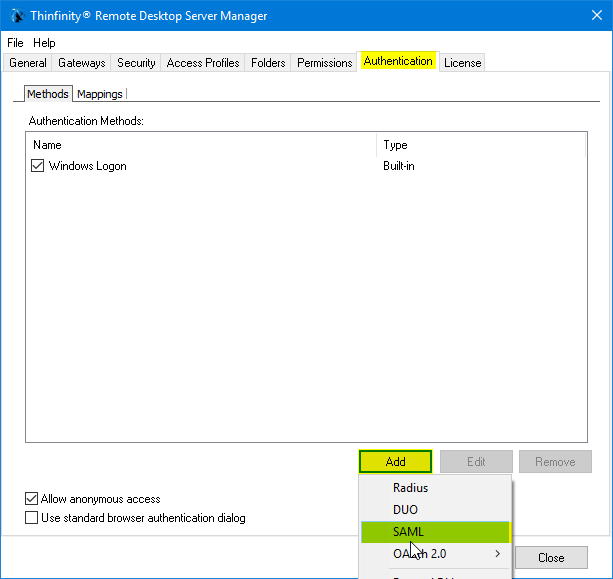
6) Now we need to configure Thinfinity with all this information .
Open the Server Manager and navigate to the “Authentication” tab, press “Add” , and then SAML :
7) Now we must configure the connection itself :
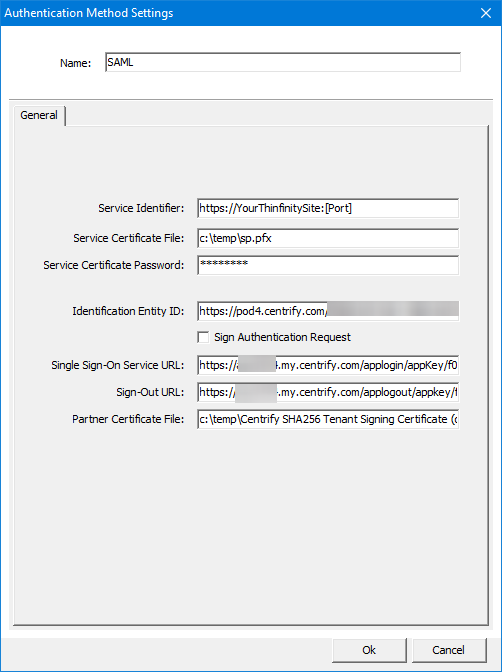
| • | Service identifier = https://YourThinfinitySite:[Port] |
| • | Service Cert File = [Path_To_Your_Certificate] |
| • | Service Cert Pass = [Certificate_Password] |
| • | Identification Entity = [IdP Entity ID / Issuer] |
| • | Single Sing on Service URL = [Single Sign on URL] |
| • | Sign-out URL = [Single Logout URL] |
| • | Partnet Cert File = [Certificate Provided by Centrify] |
Once you configured it properly , click “Ok” and then “Apply”
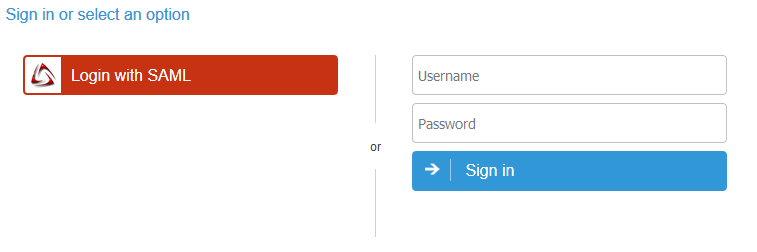
8) Now go the Thinfinity landing page and you should see the “Login with SAML” option now available to use.
This help system was created with an evaluation copy of Help & Manual.