This option is used to create your own self-sign certificate.
1. Go to the Thinfinity® VirtualUI™ Server Settings 'Security' tab.
2. Press the 'Manage certificate' button.
3. Press the 'Create a self-signed certificate' button.
4. Fill in the form below with your organization data:
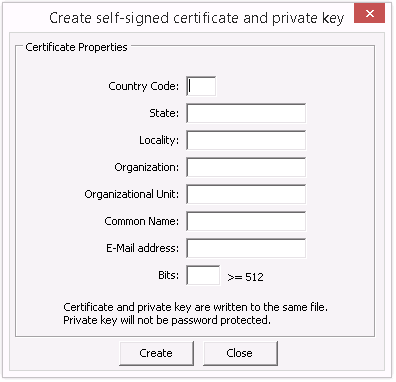
Country Code |
The two letter country code of the International Organization for Standardization (ISO 3166) |
State |
Full unabbreviated name of the state or province your organization is located. |
Locality |
Full unabbreviated name of the city where your organization is located. |
Organization |
The name your company is legally registered under. |
Organizational Unit |
Use this field to differentiate between divisions within an organization. |
Common Name |
The domain name or URL you plan to use this certificate with. |
E-Mail Address |
Company e-mail address. |
Bits |
We recommend using a 2048 length key. |
5. The 'Common Name' field should be filled with the server+domain that will be used to access Thinfinity® VirtualUI™ Server (ThinfinityVirtualUI.mycompany.com).
6. Press 'Create'.
7. Select the location where you want the certificate to be stored.
8. The application will start using this self-signed certificate created by you.
|
Because this certificate is not issued by a known Certificate Authority (CA), the web browsers will warn you they can not verify its authority. |
Read more: