You can access configuration for the HTTP Error response pages by pressing this button:
![]()
which you will find in the Server Manager General tab, when the protocol is set to HTTPS.
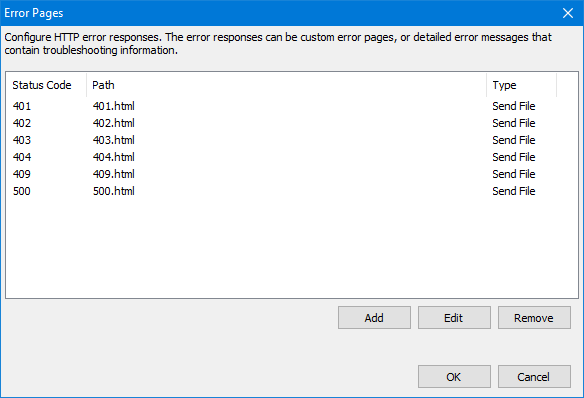
You will be presented with the following dialog:

Status Code |
This numeric code indicates the status of the response when a browser tries to access content in Thinfinity VirtualUI. The error responses may be displayed in the client browser.
The HTTP status code may indicate whether a request is successful or unsuccessful, and may also reveal the exact reason that a request is unsuccessful. |
Path |
Shows the path to the error file that will show in case of a particular status code. The default path is the 'web' directory in the Thinfinity Virtual installation directory. |
Type |
Shows the Thinfinity VirtualUI action in the event of an error status code: - Send file: Thinfinity VirtualUI will show an error page located physically in the server's computer. - Redirect: Thinfinity VirtualUI will redirect the page to any web page indicated in the configuration. |
Add |
Press this button to add a new Custom Error page. Read more about this below. |
Edit |
Press this button to edit an existing Custom Error Page. Read more about this below. |
Remove |
Press this button to remove a selected Custom Error Page. |
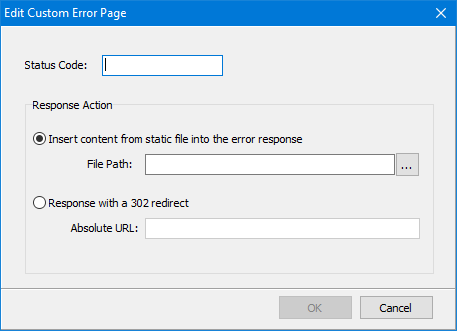
If you choose to add or edit a Custom Error Page, you will be presented with the following dialog:

Status Code |
Enter the Status Code number that you want to configure. |
Response Action |
Choose whether Thinfinity VirtualUI will show a page that is stored locally or will redirect the user to another web page. |
Insert Content from file into the error response |
Choose this option if you want Thinfinity VirtualUI to show a static page locally stored in your Thinfinity VirtualUI server. Complete the file path by selecting the file you want to show with the button. |
Response with a 302 redirect |
Choose this option if you want Thinfinity VirtualUI to redirect users to a web page. Type the Absolute URL to this web page in the field below |
Press OK to save the changes.
Read more: