To add a new KERMIT File Transfer Job to the Queue, follow these steps:
1. Open the Connection to the host you want to make a file transfer with.
2. Click on the File Transfer bottom context menu item.
|
File Transfer Click to have access to the "File Transfer" Manager. |
3. If you are going to make an upload, remember to first upload the file into z/Scope Anywhere Server, on the Files tab.
4. Go to the Queue tab and click on the Add button, to insert a new job to the Static Queue.
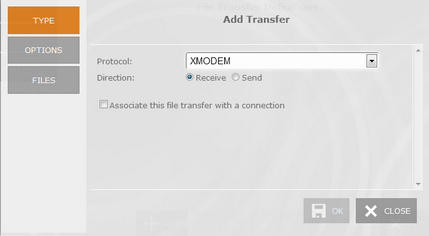
Type tab:

Protocol
Select the KERMIT protocol.
Direction
The Direction indicates if you are setting a download (RECEIVE) from the host to z/Scope Anywhere Server, or an upload (SEND) from z/Scope Anywhere Server to the host.
Associate this file transfer with a connection
This option allows you associate the File Transfer job with one specific connection. This job will only be shown on the selected connection.
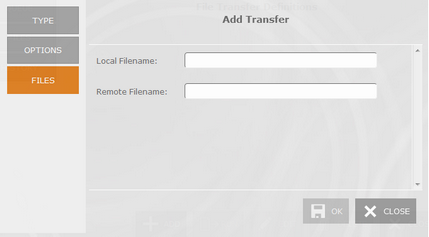
Files tab:

Local Filename
In this field you must type a name for the file stored at the remote host.
Remote Filename
In this field you must type a name for the file stored on z/Scope Anywhere Server. All the available files are listed on the Files tab.
Once you finish to set up the file transfer job, click on the "OK" button and it will be shown in the Static Queue.
In the future, whenever you need to change the File Transfer settings you can select this job and click the Queue 'Edit' button.